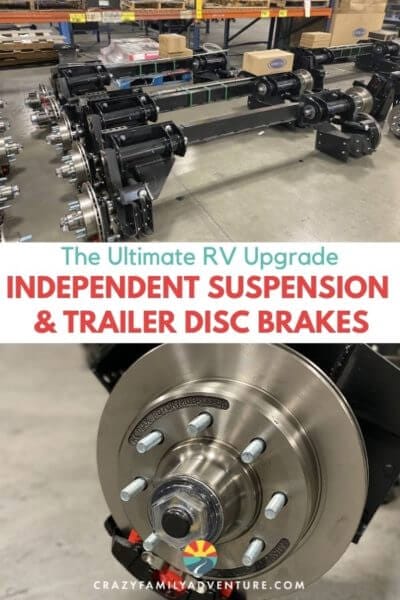
If you’re looking to make a major leap in towing comfort and safety. Upgrading to a MORryde independent trailer suspension as well as trailer disc brakes is the way to go.
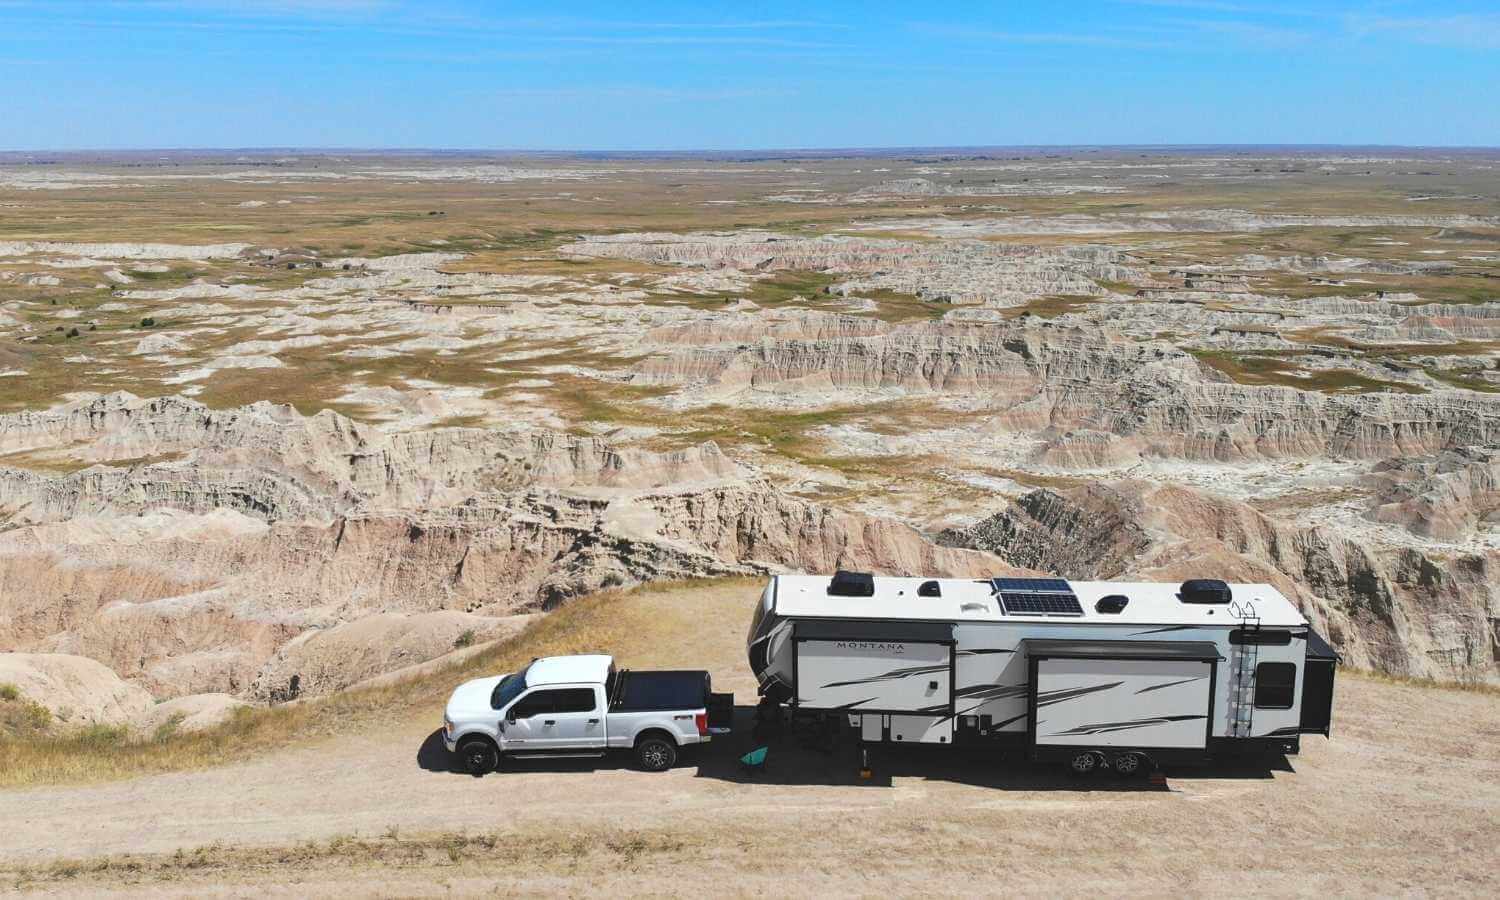
We recently had the opportunity to have a MORryde Independent Suspension System and Disc Brake package installed on our Montana High Country 5th wheel. These are at the top for our recommended RV upgrades and 5th wheel accessories.
The quality of the components used as well as the care and attention to detail during the installation showed us how much of an improvement this upgrade truly was.
Now, having this done on your rig is not a decision to take lightly. There many factors to weigh (no pun intended) when considering if this is an upgrade of this kind, but here’s a spoiler alert, it’s SO worth it!
In this article, I’ll talk about our experience of getting the IS and Disc Brakes installed at MORryde, an overview of the system itself, and our review of it after putting the first thousand miles on it.
Table of Contents
Independent Suspension
Why to Upgrade
First, with so many RV upgrade opportunities, let’s look why you’d want to upgrade your stock 5th wheel or trailer suspension. Conventional trailer suspension consists of one or more axles that are supported by leaf springs. The leaf springs are basically a stack of steel leaves that flex just enough to add some cushion to the house part of the trailer when hitting bumps in the road.
While this does do an adequate job of taking away some of the jarring-ness of a bad road, it doesn’t always provide enough cushion. We’ve had countless times of coming into our trailer after hitting a bad stretch of road to find a mess inside. We’ve had cabinets fly open while we were driving as well as our refrigerator door. Finding shattered glass or food and drinks all over the floor is no way to start a camping trip.
You will have a set of 2 leaf springs for each axle, one for each wheel basically. For trailers with more than one axle, you’ll have multiple leaf springs. For multi-axle trailers, the leaf springs are connected between the front and rear wheels with an equalizer that makes the leaf springs on each side work together to absorb as much shock as it can.
The issue here is that not only are the wheels connected by the axle they are now also tied together to other wheels on the same side through the leaf springs and equalizer. So you hit a rough patch on the front left tire, that will affect the front right tire via the axle as well as the left rear tire via the leaf spring. Even though the leaf springs are absorbing bumps, it’s also jostling the trailer around meaning your stuff inside can be affected.
What’s The Difference With Independent Suspension?
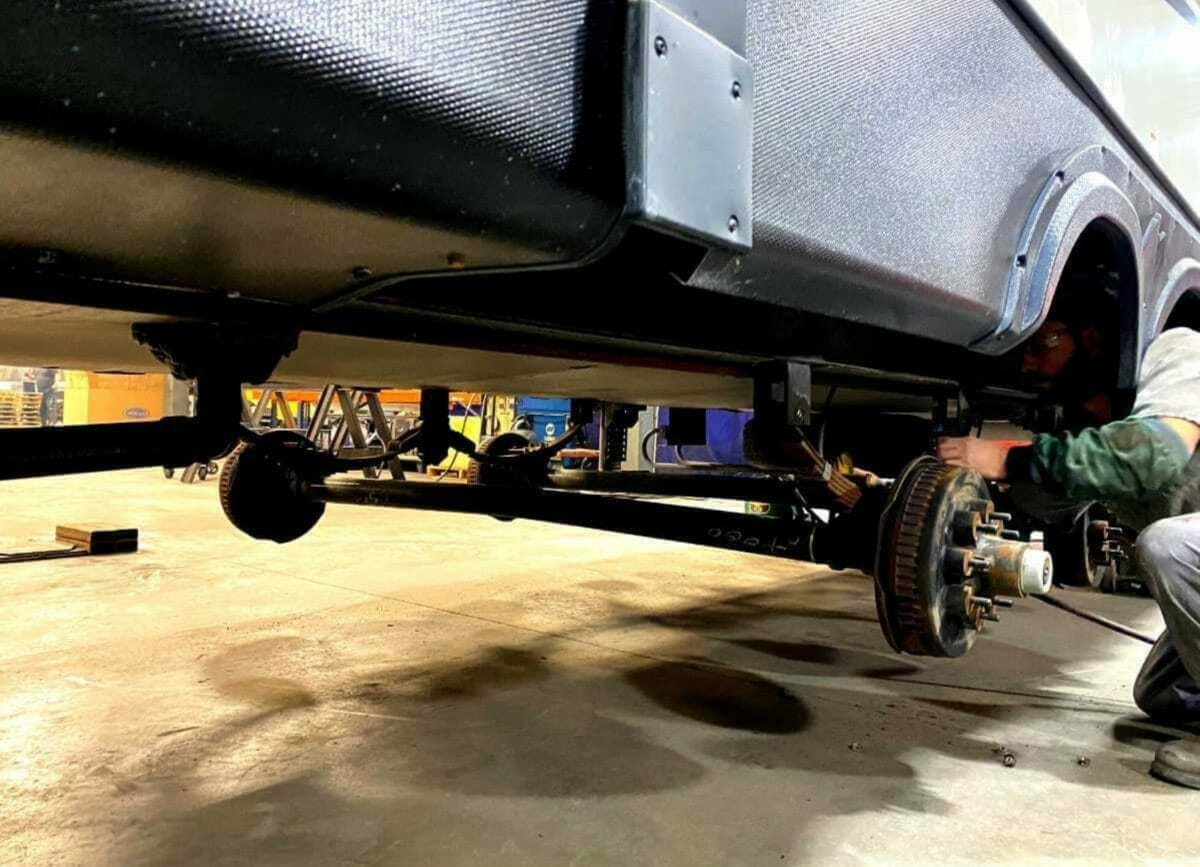
Well, just as the name suggests, this suspension design allows each wheel to move independently from every other wheel. As you’ll see in the installation section of this article, MORryde completely removes your axles. Axle less trailer suspension? Yup, gone, axle less suspension. So the wheels are no longer connected via axle and there are no more leaf springs either (those get removed as well), so the wheels on the same side are no longer affecting each other either.
This means each wheel can move freely up and down greatly reducing the amount of energy the road shock is sending up through not only your trailer but your tow vehicle as well.
Another major difference is that conventional leaf springs only allow about 2″ of suspension travel, meaning you only have 2″ of cushion before the house part of your RV starts to move. That’s not that much, which means a lot of jostling goes on inside your rig.
With MORryde’s IS, you get 5″ of travel which more than doubles that of conventional leaf spring suspension. This means there is much more cushion and quite a bit more road shock absorbed by the suspension system.
Components
This system comes in a couple of different configurations based on the GVWR of your trailer. They have systems ranging from 7k – 10k GAWR axles. It’s a good idea to get your trailer weighed before heading into MORryde so they can dial in a system that is perfect for your trailer.
If possible, have your trailer weighed at a place that can weigh each tire individually because some trailers can be significantly heavier on one side compared to another. If this is the case, MORryde can install a system that supports extra weight on one side.
The system is cushioned by a large rubber shear spring which is the main cushion of the system There is also a hydraulic shock absorber that gets the wheel back to its normal ride position after hitting a bump thus minimizing the amount of bouncing the wheel may want to do.
Having simple and reliable components makes it easy to maintain and service this system. I’ll talk about maintenance in a bit, but if you ever need to service or replace either the rubber shear spring or the shock absorber, it’s easy enough to do yourself or swing by MORryde for them to take care of it.
Installation
So, one of the interesting things about MORryde’s IS system is that there are really only 2 places in the country to get it installed. So installation might require some travel. There’s MORryde’s factory in Elkhart, Indiana and there is another RV service center in Grant’s Pass Oregon that does installs. That’s it!
So that is a challenge, but also a benefit. A challenge because if you’re in the southwest and want this installed, you’ll have to head to either of those locations, which can be over a thousand miles just to have it installed. On the other hand, it is also a benefit because you know when you get the system installed, it is being done by someone who knows it inside and out and you’ll have the best install you possibly can have.
I’d suggest having it done at MORryde’s facility because they have all the parts on hand in their shop and if they happen to need something special, they can fabricate just about anything.
We visited them in January to have the day-and-a-half install take place. Yes, you will have to make plans for overnight accommodations for a couple of nights. There is some pre-work that needs to be done before they can start the installation, like measuring your ride height, pre-install test drive, etc. so you’ll want to arrive early enough the day before your installation to have all of this done.
Full Timers
The cool thing is that MORryde recognizes this as a headache for full timers, so they allow overnight parking in their parking lot as well as allowing folks to stay in their rigs overnight while the work is being done. It’s not ideal, but it’s probably more convenient, comfortable, and less expensive than staying at a hotel.
They have 50 amp electrical hookups out in their parking lot and a 30 amp hookup while inside their shop. They also have a hose just outside the shop where you can fill your fresh water tank so you’ll have enough water to get you through the next couple of days. I’d recommend dumping your holding tanks before you get there just so there’s enough room in them as well.
We had a few other things being installed by MORryde while we were there, so we got there 2 days before our scheduled appointment. Upon arriving, we filled up fresh water and backed into a large space in their lot where several other brand new rigs were parked that were queued up for OEM installations. Parking is no problem as there is plenty of room. We plugged into the 50 amp and settled in for the night.
Day 2
The next day the first thing we installed was a MORRyde Rubber Pin Box. This was an important first step because they wanted to be sure to have the correct height of our 5th wheel when it is hooked up to the truck.
After the pin box was installed, we pulled our rig in front of the service bays where they came out to take some measurements. They measured the clearance under the frame at both the front and rear of the 5th wheel as well as measuring the height of the rig from the top air conditioners. Their goal when installing the IS is to make your trailer or 5th wheel as level as possible when hooked up to your tow vehicle.
In our case, we needed to have the rear end raised 5 inches to get as close to level as possible. This seemed like the max they could go without compromising the center of gravity of the trailer. They also made sure that by raising it that much in the rear, it wouldn’t increase the height of the rig in the front which could cause problems with low bridges.
After getting these measurements, I backed the 5th wheel into their shop and then the real fun began.
MORryde
MORryde has a really nice lobby area where they welcome you to hang out while you wait on the install. This is where our kids spent most of the day and Bryanna and I were in and out between checking on the install and trying our best to document the process.
They also have a nice grassy area outside if the weather is nice or if you have pets. Another really nice touch is that they order lunch to be brought in from a local restaurant each day you are there. They have soda, water, and snacks in the waiting area as well as a TV, wifi, and outlets to charge your electronics.
Installation
Starting the installation, first, they jack up the trailer on 4 big hydraulic jacks to get the vehicle chassis completely off the ground, then they remove the wheels. I just had new tires put on our 5th wheel, so mine were in good shape, but another service MORryde offers is replacing tires and wheels. They have the equipment to mount and balance tires in the shop, so if it’s on your list, this is a great time to do it.
After the tires are off, it was time to remove the axles. They remove the bolts that connect the leaf springs to their frame hangers. This will drop the axles to the ground while the inside of the leaf springs are still hanging by the equalizer. Next, they remove the bolts from the equalizer shackles which frees the axles from the trailer and they clunk to the ground.
Once the axles are off, you have a choice of what to do with them. MORryde will scrap them or you are free to bring them with you. I actually posted mine on Facebook Marketplace as there are a few Elkhart groups in the area. When I posted them (axle, wheel hub, drum brake assembly) I had 23 offers in like 15 minutes. I posted them for $100 each, which I guess was too low, and had someone pick them up that night. It was super easy to do and made a little cash back for me in the process. Highly recommend trying that.
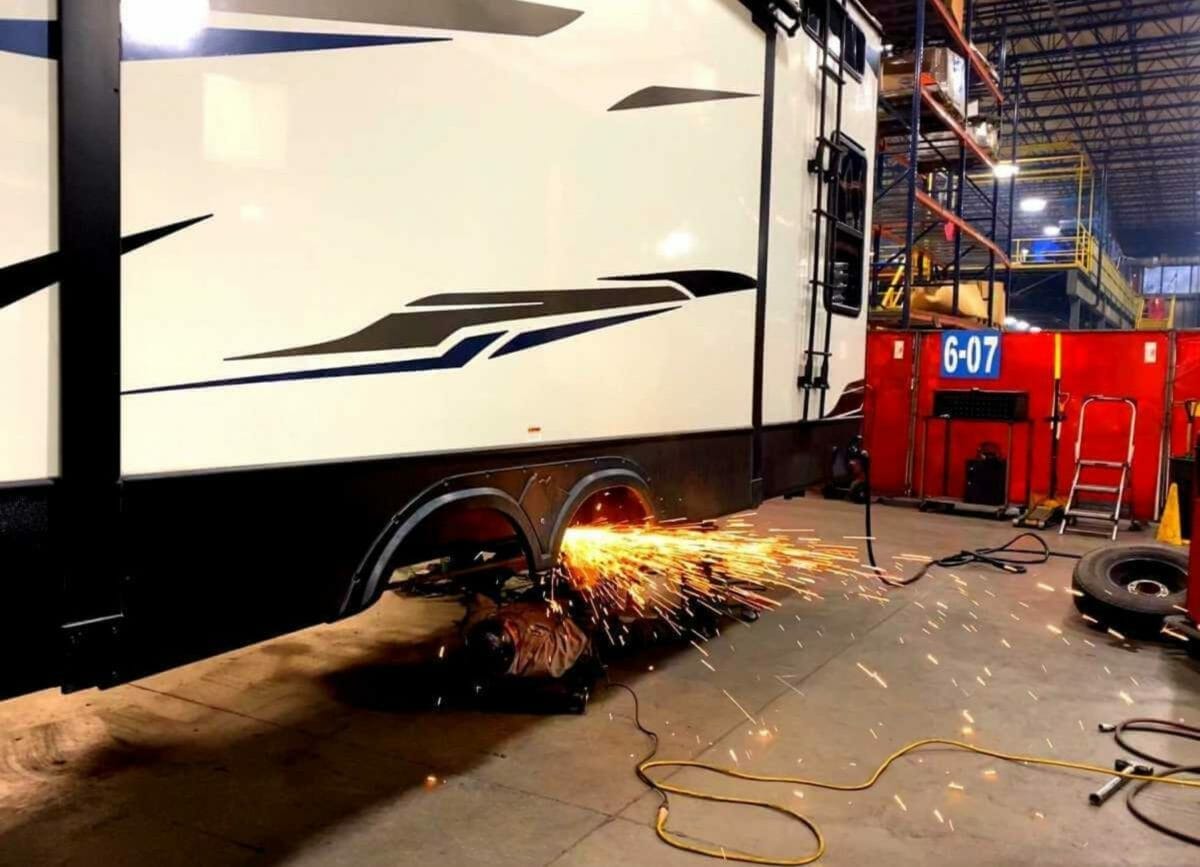
Axles Off
Now that the axles are off, the hangers are cut and ground down from the frame. From here, you have a clean slate and are ready for the IS to be installed. That’s where our day 1 ended. Day 2 started at 6 am, which was a bit rough for us!
A quick note about sleeping inside their shop. It’s pretty loud all night long. They said sometimes they have a 3rd shift running and lucky for us they had one running while we were there. So bring some earplugs or run some loud white noise to help drown out some of the factory noises.
6 am came quickly, so we rounded up the crew, pulled in the slide-outs, and headed to the lobby area. The installation team was ready to go, so they got started right away.
The first thing that went on was the steel bars used to raise our independent rear suspension to level out the trailer. This is welded directly parallel to the frame and this is what the IS cross member is attached to.
In our case, since they raised it up 5″, they put 2 additional cross members to support the 5″ riser, essentially creating a square. It made it super sturdy and ready for the IS to be installed.
Building The Independent Suspension
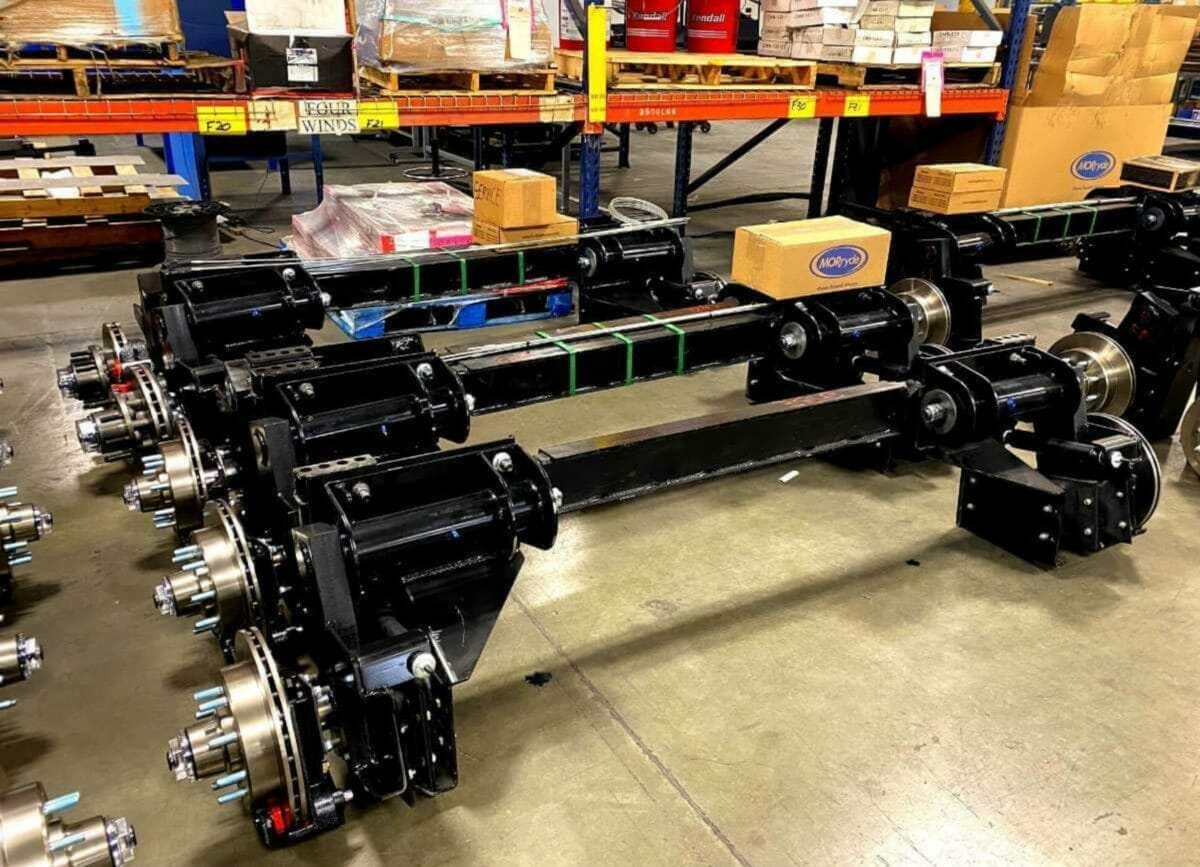
While all the prep work was being done, another team was building the Independent Suspension system for our unit. They build it based on the weight capacities of your rig as well as if you’ve chosen to upgrade to disc brakes as well. We had the 7k setup installed on our unit as well as the disc brakes, which I’ll talk about later. The IS assembly puts together the cross member, hanger assemblies, wheel hubs, and brake assemblies.
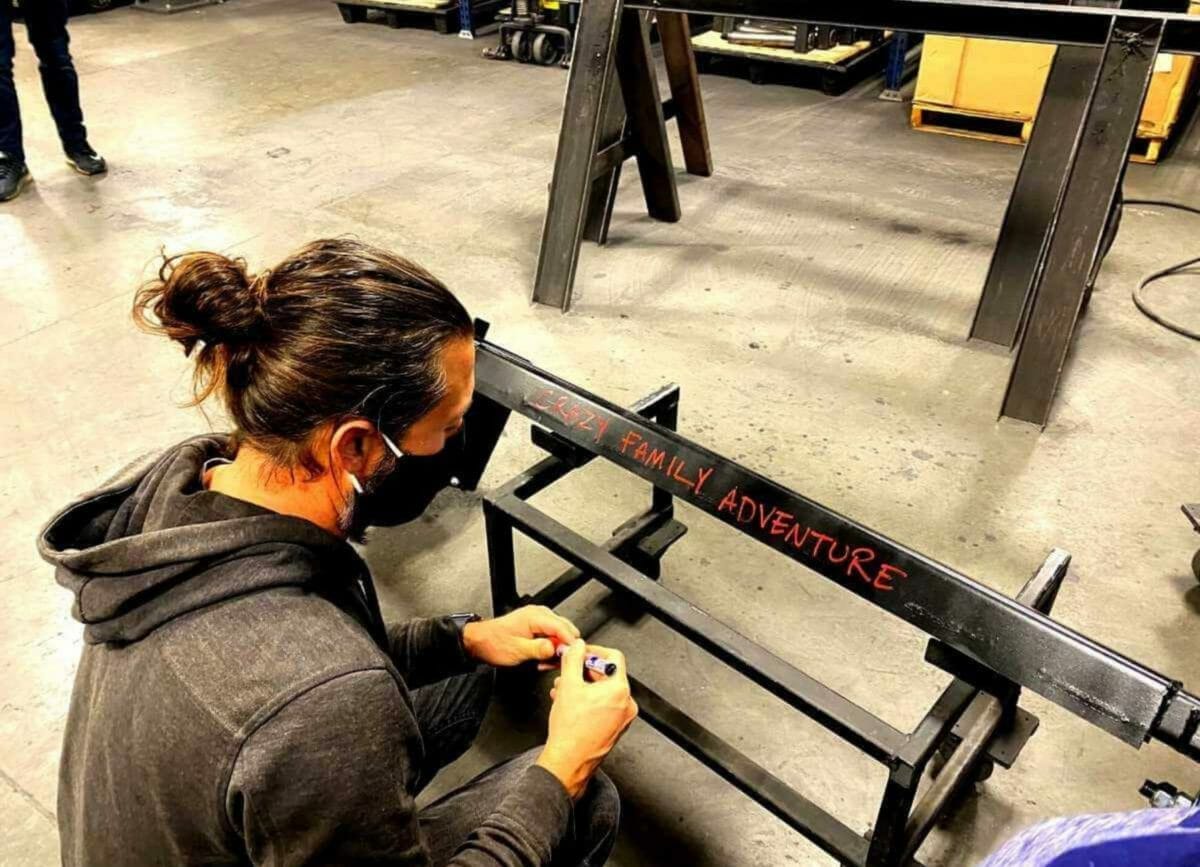
When this was ready to go, we all put a finishing touch on it by signing it, just for fun. Then they were wheeled over to the rig and jacked up to the frame for installation.
The IS system is welded right onto either your frame or the risers they put on to level your unit. From there, they hook the brake lines up, either by connecting the existing electrical brake connections or installing new hydraulic lines if you went with the disc brake package.
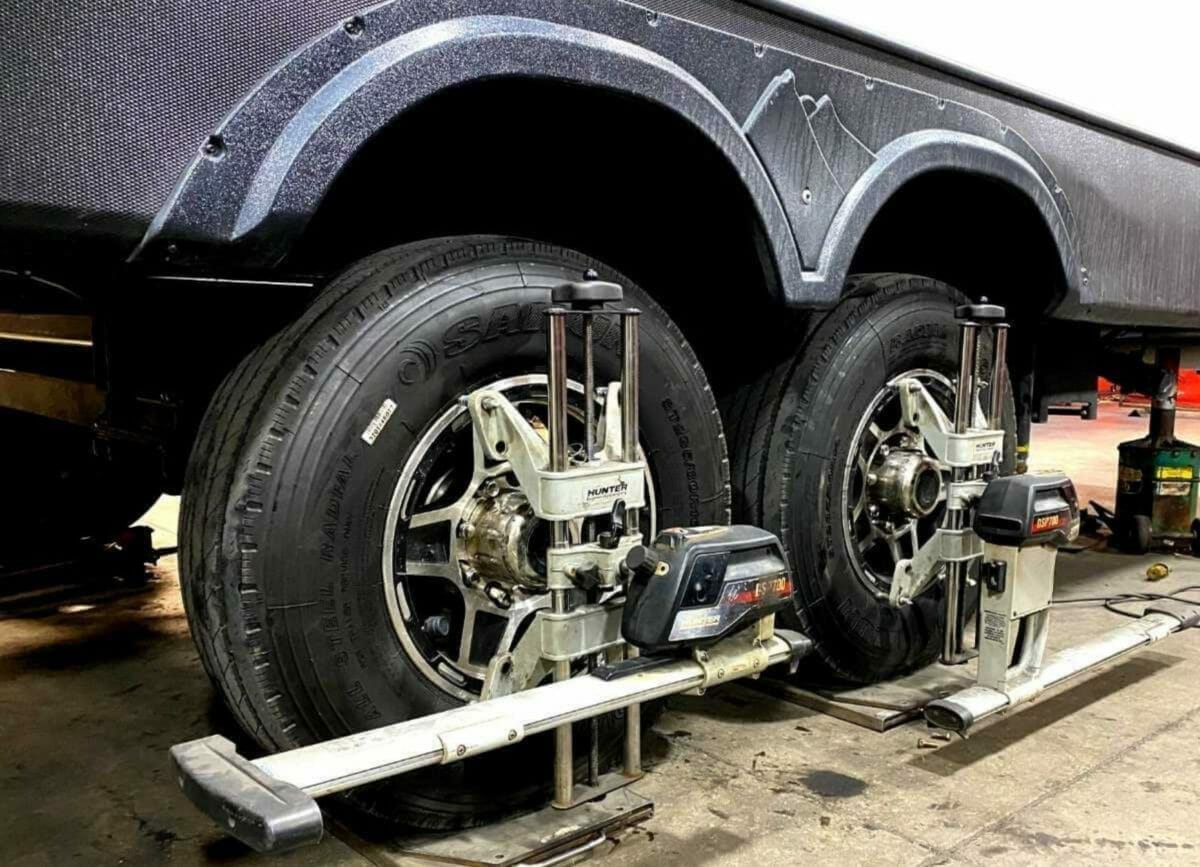
After the welding is finished and the brakes are connected, the tires are ready to be put back on. Once the tires are back on, the wheels are aligned using a pretty cool Hunter Laser Alignment system where they connect it to a computer to take some readings and make adjustments until it’s just right.
Trailer Taken Off The Jacks
After the alignment is finished, the trailer is taken down off the jacks. And you’re ready to go for a test drive. There’s a nice little track in Elkhart around the MORryde facility. It has plenty of potholes and train tracks to really test out the new suspension.
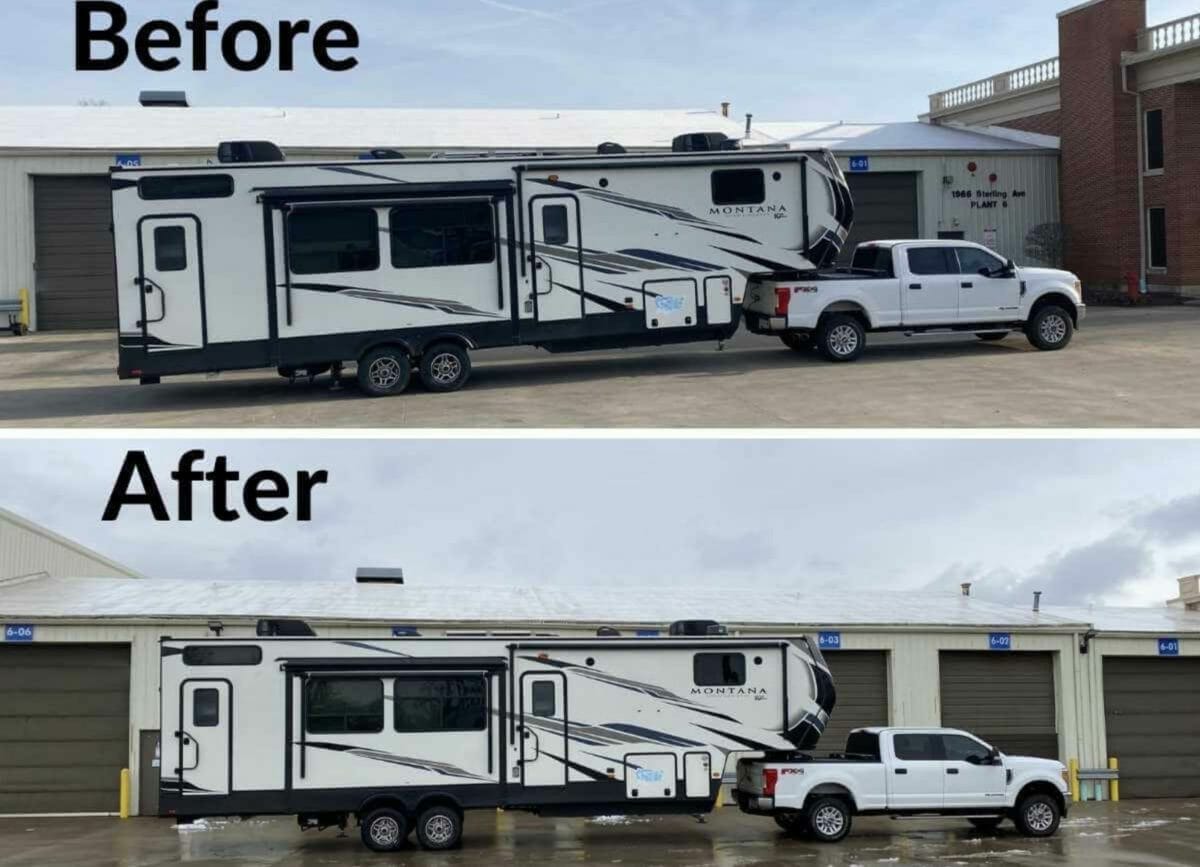
Once you’re back, the installers will take one more set of measurements while you’re hooked up to your tow vehicle. To make sure the height adjustments were good. Here they’re making sure the highest point of your trailer isn’t too high for normal traffic conditions.
Our max height didn’t change while the back end was raised up to 5″ just as expected. The truck and 5th wheel looked much more level now than it did when we came in.
This system will definitely add some weight to your trailer. The parts they use are much more heavy-duty than the original parts are taken off. Now it may not be a ton of weight, but it’s just something to keep in mind when doing this upgrade.
Maintenance
Protecting your investment is pretty important since this is such a major upgrade. Luckily, MORryde’s IS system is pretty low maintenance. There are a couple of Zerk fittings on the IS that need to be greased once a year or every 6000 miles.
The shock absorber only needs to be inspected every once in a while to make sure it’s functioning properly, there is no maintenance that can be done to it. You’ll want to be sure it hasn’t taken any damage from road debris and that there are no leaks coming from it. Also, listen for any unusual noises. If any of these are the case, it should be replaced.
The rubber shear spring should also be inspected every once in a while to be sure it looks good. You’re basically looking for any issues with the rubber bonding to the steel plates or if there is an issue with the rubber itself. This would be pretty obvious when looking at it and is something that can be replaced.
Another question I had was how to jack up a wheel in the event a tire needed to be changed. Seeing how the rear of the 5th wheel was raised 5″, I don’t have a jack big enough to reach the frame of the trailer. The good news is that you can jack up the wheel under the beam assembly of the Independent Suspension. This is located under the rubber springs.
MORryde offers a few different types of bearings when putting on an IS system. Be sure to find out which you have so you can maintain the bearings per the manufacturer’s recommendations.
For more information on all the maintenance, check out MORryde’s Independent Suspension Service Manual.
Independent Suspension Cost
For the cost for Independent Suspension is as follows for 7k Axles, it is best to call MORryde and get the current cost. But plan on it costing over $4000.
Independent Suspension Review
We’ve had the Independent Suspension upgrade on our 5th wheel for a few weeks now. We have towed it about a thousand miles.
My honest review is that this is an upgrade everyone must seriously consider. I know the cost of it is a little high, but having the absolute best suspension system on your trailer is priceless.
I no longer have to worry about feeling the road chatter up in the truck when we’re towing. The ride is super smooth and very comfortable. After our first major trip towing with the new suspension, the inside of our RV was in better shape than usual. We typically have a few things that fall on the floor during transit, but this time everything stayed put.
Also, even though the system added some weight because of the heavy-duty components used as well as the steel cross members that were added, I think this really shored up the frame and added some extra support for it.
Along with the towing being super smooth, there is no sway either. When large trucks pass me on the highway, the 5th wheel stays right on course behind my truck. The entire setup feels rock solid.
Raising The RV
I also really like the fact they raised it up a few inches to level it out with the truck. It’s not perfectly level because we have a very high bed on the truck. However, it’s much better than it used to be. I now have 5 extra inches of ground clearance on the back end. This is huge for us since we like to get off the beaten path and boondock quite a bit.
I’m extremely happy with how the new suspension is performing. It is well worth the cost of the upgrade. Towing was greatly improved with a much more comfortable ride and better handling. Also with the 5″ of wheel suspension travel, IS gives you, it could add years of life to your trailer.
The team at MORryde is very professional and extremely knowledgeable when it comes to improving your overall towing experience. They knew exactly what had to be done to make it as quick and successful of an install as possible.
They also made it a much more comfortable stay with the perks and amenities they offered during the installation.
Independent Suspension and Disc Brake Installation Video
Check out our experience having the IS and Disc Brake system installed at MORryde in Elkhart, Indiana as well as more information on the system from MORryde’s Jack Enfield!
Disc Brakes
Another great upgrade option to make towing a safer and more enjoyable experience is going to one of MORryde’s trailer brake systems. This is an additional option that MORryde offers when installing independent suspension.
One thing to note is that you can have the independent suspension system put on and keep your current brake set up. Conversely, you can have disc brakes put on without having the independent suspension system installed. Just let MORryde know what you’d like to do.
We opted for this upgrade. Since being able to stop my 5th wheel is one of the most important things to me when towing. I really want to be confident in my trailer braking when I’m coming down a steep grade. Also when in traffic where I may have to stop on short notice.
Trailers usually come with drum brakes. With disc brakes, you reduce your stopping distance by 40%, have much quieter braking, and reduce heat build-up much better than drum brakes. That’s huge and can be the difference in stopping safely.
Components
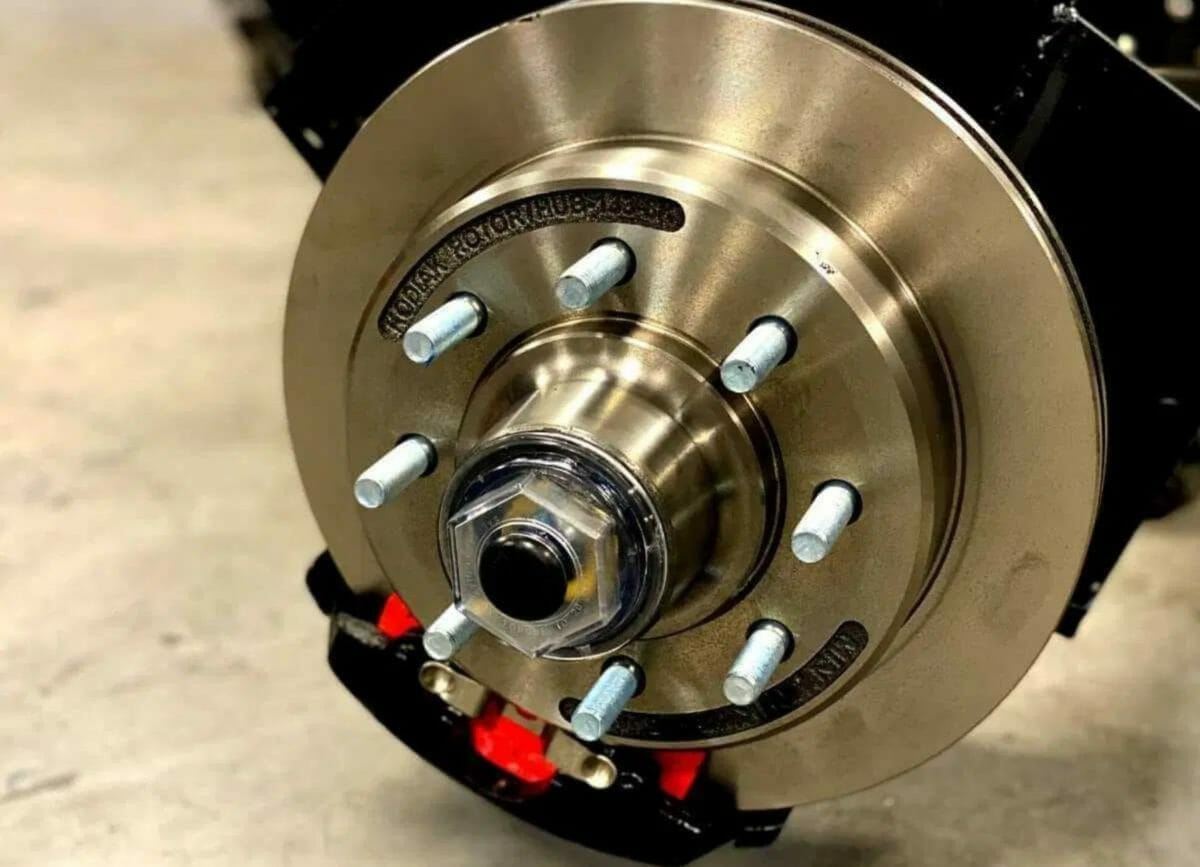
MORryde uses top-quality components for the disc brakes they install. They use Kodiak rotors and brake pads which are the best when it comes to trailer disc brakes. The pads are ceramic and the pistons are made of stainless steel.
Another component of this installation is the brake actuator. Most trailers have electric brakes. Meaning they are controlled by an electric signal that is sent from the tow vehicle back through to the trailer’s brakes. The disc brake upgrade converts this to an electric/hydraulic hybrid system.
Now, instead of electric current being used to activate the brakes on the trailer, brake fluid is. The electric current is still being sent from the tow vehicle. But the brake actuator takes the amount of electric current sent from the truck. Converts it to the amount of hydraulic force needed to be pushed through the brake lines to stop the trailer proportionally to your braking effort in the truck.
We are towing with a 2017 Ford F-350. There is a setting for the braking type that is meant for a system like this. If you go into the Towing settings on the truck’s console. Then go to Brake Type, change it from Electric to Electric over Hydraulic. That’s it.
Installation
Our installation experience was all part of the overall suspension upgrade install. We opted for this hydraulic disc brake system to be installed with the independent suspension so it was all done at the same time.
If you choose to do it separately, MORryde has brake assemblies that mount to the axles like normal. They will mount the brake actuator in a front bay. Ours went in near the batteries. From the actuator, they’ll run brake lines under your rig back to the brakes.
They will cut the existing electric brake lines to make room for the hydraulic lines. Depending on your rig installation may require some modifications.
Once this is all put together and the wheels are back on. They’ll bleed the brakes just like a car to make sure all air is out of the lines and the proper amount of fluid is in the actuator’s reservoir.

Maintenance
Similar to car maintenance for brakes, it’s really just a matter of keeping an eye and ear on them. If you start to hear some squealing, then it may be time to replace the pads.
On my wheels, I can look through to see the rotors. I like to keep an eye on them to be sure there are no visible pitting or scratches. That would indicate it’s time for them to be changed.
In the brake actuator, you have to keep an eye on the fluid level in the reservoir. Where our is installed, it’s easy to access and to open the cap and look inside for the fluid level. If it’s low, it takes DOT 3 brake fluid available at pretty much any auto parts store.
Disc Brake Cost
For cost it is best to call MORryde but plan on it costing over $3000.
MORryde does offer a bit of a cost savings. If you do both Independent Suspension and Disc Brakes at the same time. As there is a savings on labor.
Disc Brake Review
Just like the independent suspension, this is a fantastic upgrade. I felt it the moment I left the parking lot for a test drive. Getting to the first stop sign I felt the trailer really grabbing the truck.
After the install. I changed the brake type to Electric Over Hydraulic. But didn’t change the brake effort as I wanted to see if it would be necessary. It was! Previously I was towing with 7.5 brake effort and High for the intensity level. After doing some adjustments, I settled at 6.5 with Medium effort being the right spot for me.
Now I get smooth, effortless stops and super quiet brake operation. After the first thousand miles. I have a ton of confidence in these brakes and it’s one less thing I have to worry about.
Overall, these are 2 upgrades you can do to your trailer that will provide amazing results when towing. I highly recommend it!
Click here to visit MORrydes contact us page. Be sure to tell them Crazy Family Adventure sent you!
Also, be sure to check out these 25 5th Wheel Accessories for your ultimate camping experience!
Pin it for later:
**Disclosure: A big thank you to MORryde for supplying and installing the Independent Suspension and Disc Brakes. All opinions are our own.
Find out more about RV Living
7 Best RV Roof Sealant Options
5 Best RV Sewer Hoses for Clean Camping
9 TV Mount Options (+ Tips on How to Choose One)
29 Kitchen Accessories for the Best RV Kitchen
I have a bit of a sense of humor, and when others don’t find me funny, I always do.I don’t take myself too seriously and I love my family.That’s why we’re doing this 🙂
- 31 Amazing RV Upgrades You Can’t Live Without - July 9, 2024
- 8 Breathtaking THINGS TO DO Near Yellowstone National Park - May 22, 2024
- Utah National Parks Road Trip: All 5 Parks & More [Map Included] - May 11, 2024
DISCLOSURE: This post may contain affiliate links, meaning I get a commission if you decide to make a purchase through my links, at no cost to you. Please read my disclosure for more info.